The Dashboard
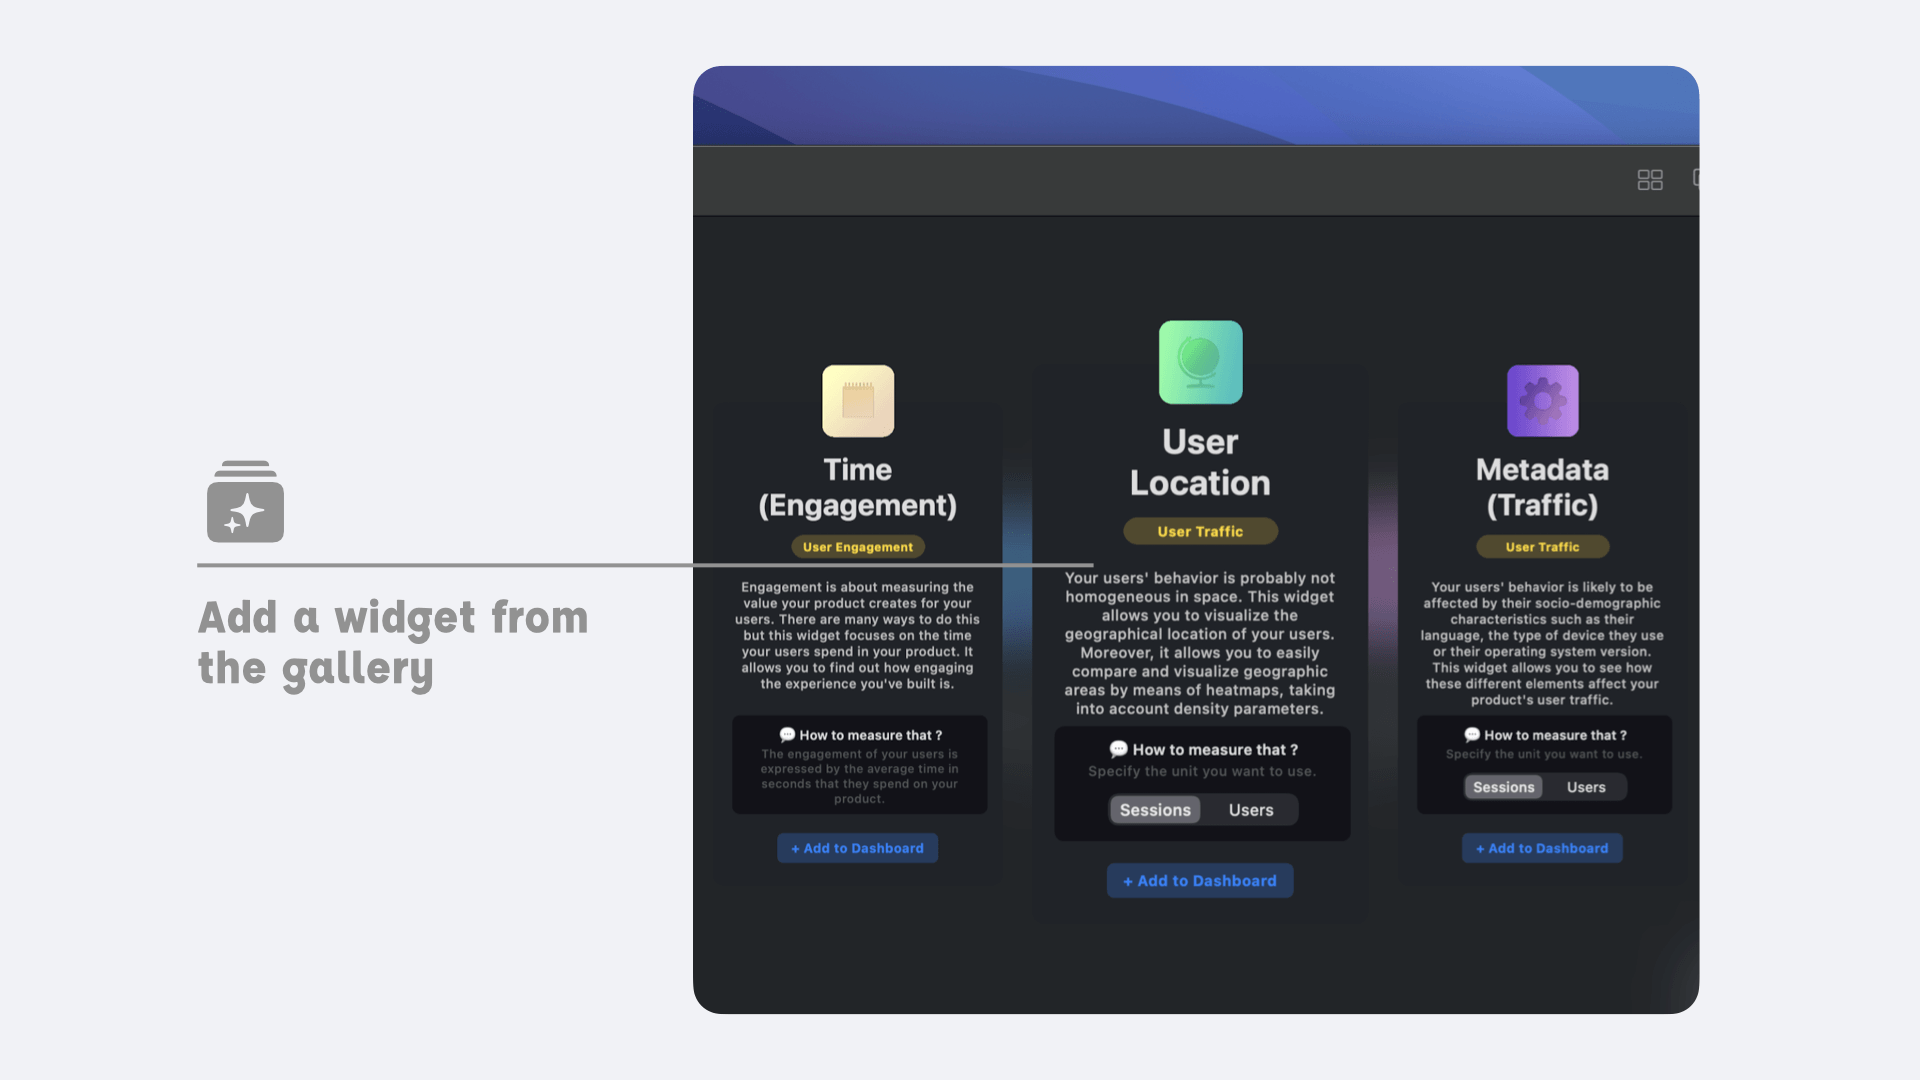
The dashboard lets you visualize your data using widgets. Each widget offers a visualization interface adapted to the data being processed. For example, the location widget lets you visualize your data on a map using heatmaps. Other widgets offer visualizations based on bar or graph charts.

You can customize the Dashboard using the last two buttons located to the left of the tool bar. The rightmost button allows you to add a new widget to your dashboard while the second activates edit mode. When the Dashboard is in edit mode you can re-organize the widgets by simply drag and drop. You can also delete the widget using the x button that appears in the upper right corner.
Widget Options
You can customize the display of your widget using the settings accessible through the gear button located in the upper right corner of the widget (the second from the right). This button reveals a panel that allows you to:
- Change the graph display mode. You can choose to display it as an absolute value or as a percentage. The x-ray mode allows you to visualize your data relative to a baseline.
- Change the unit used for the graph. So you can view a number of sessions or a number of users.
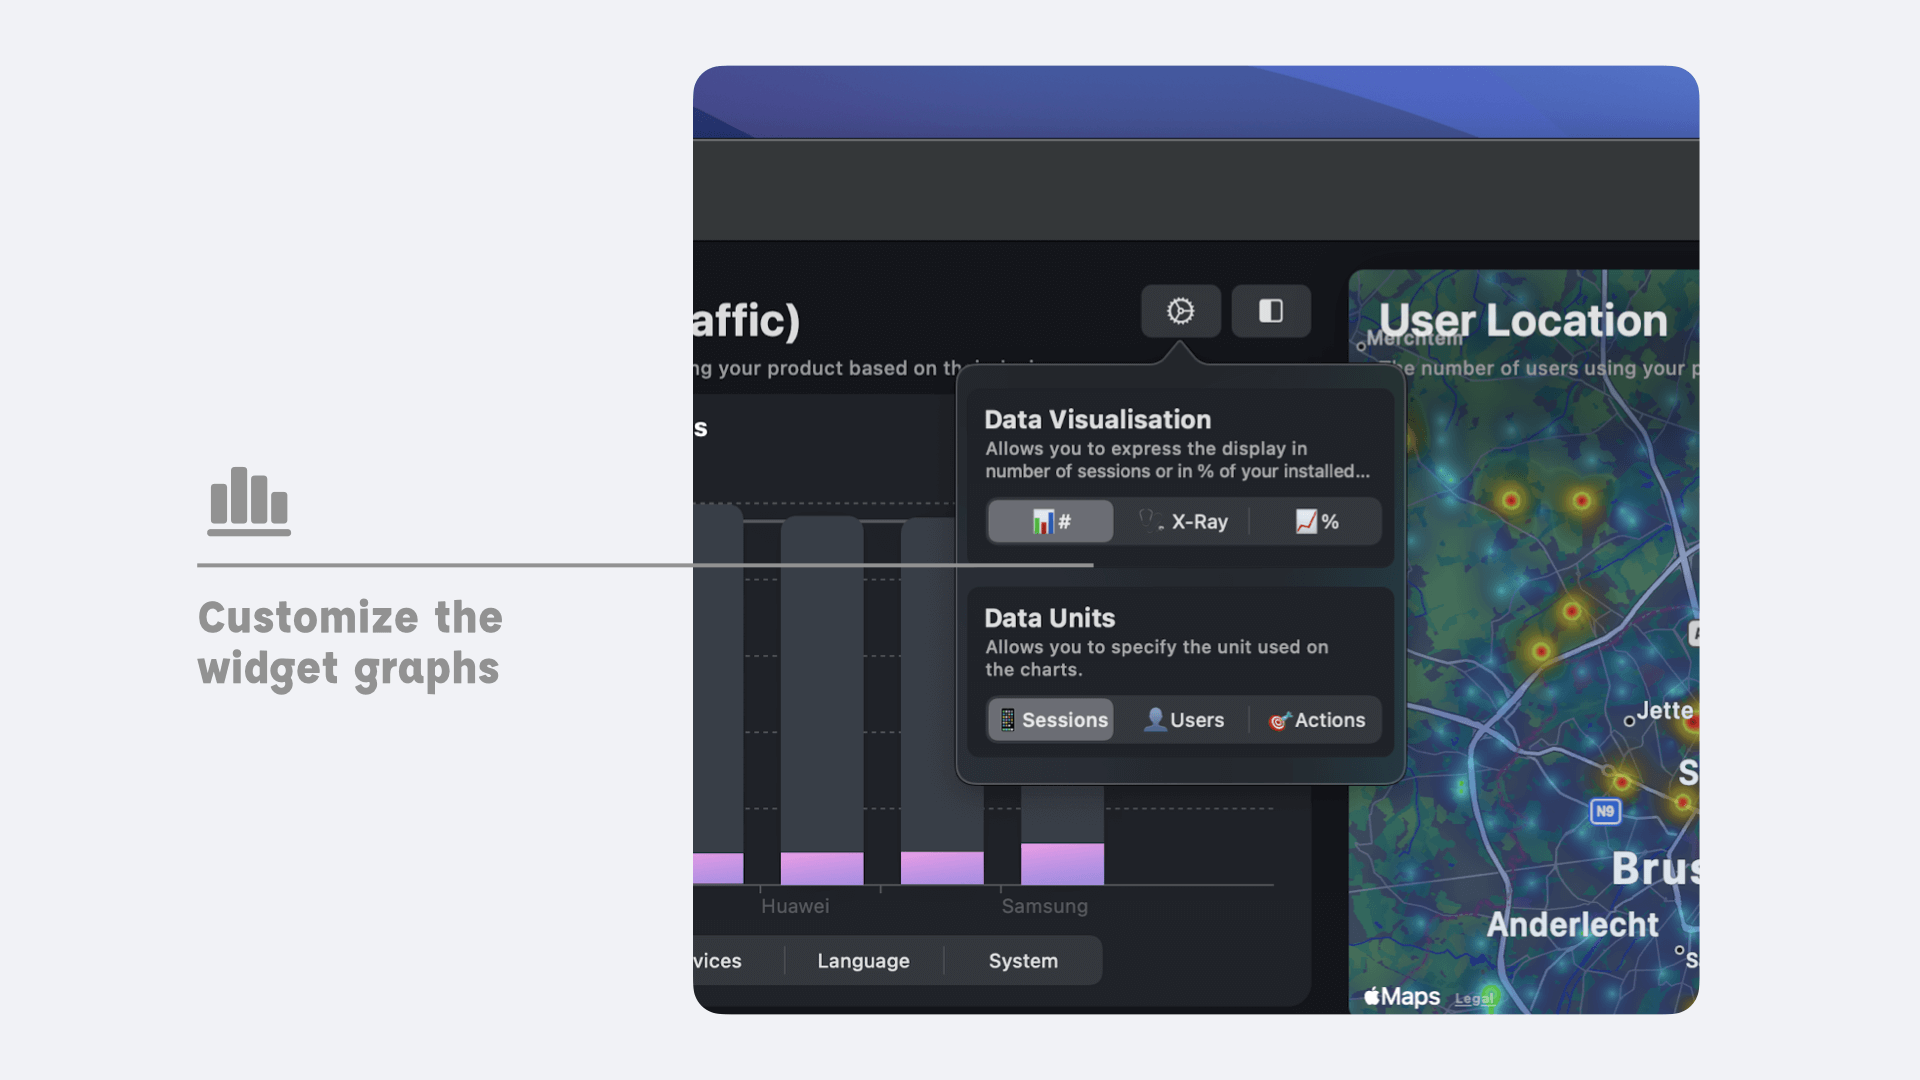
Finally, a word about the second button, the one furthest to the right, it allows you to enlarge the display of the widget.
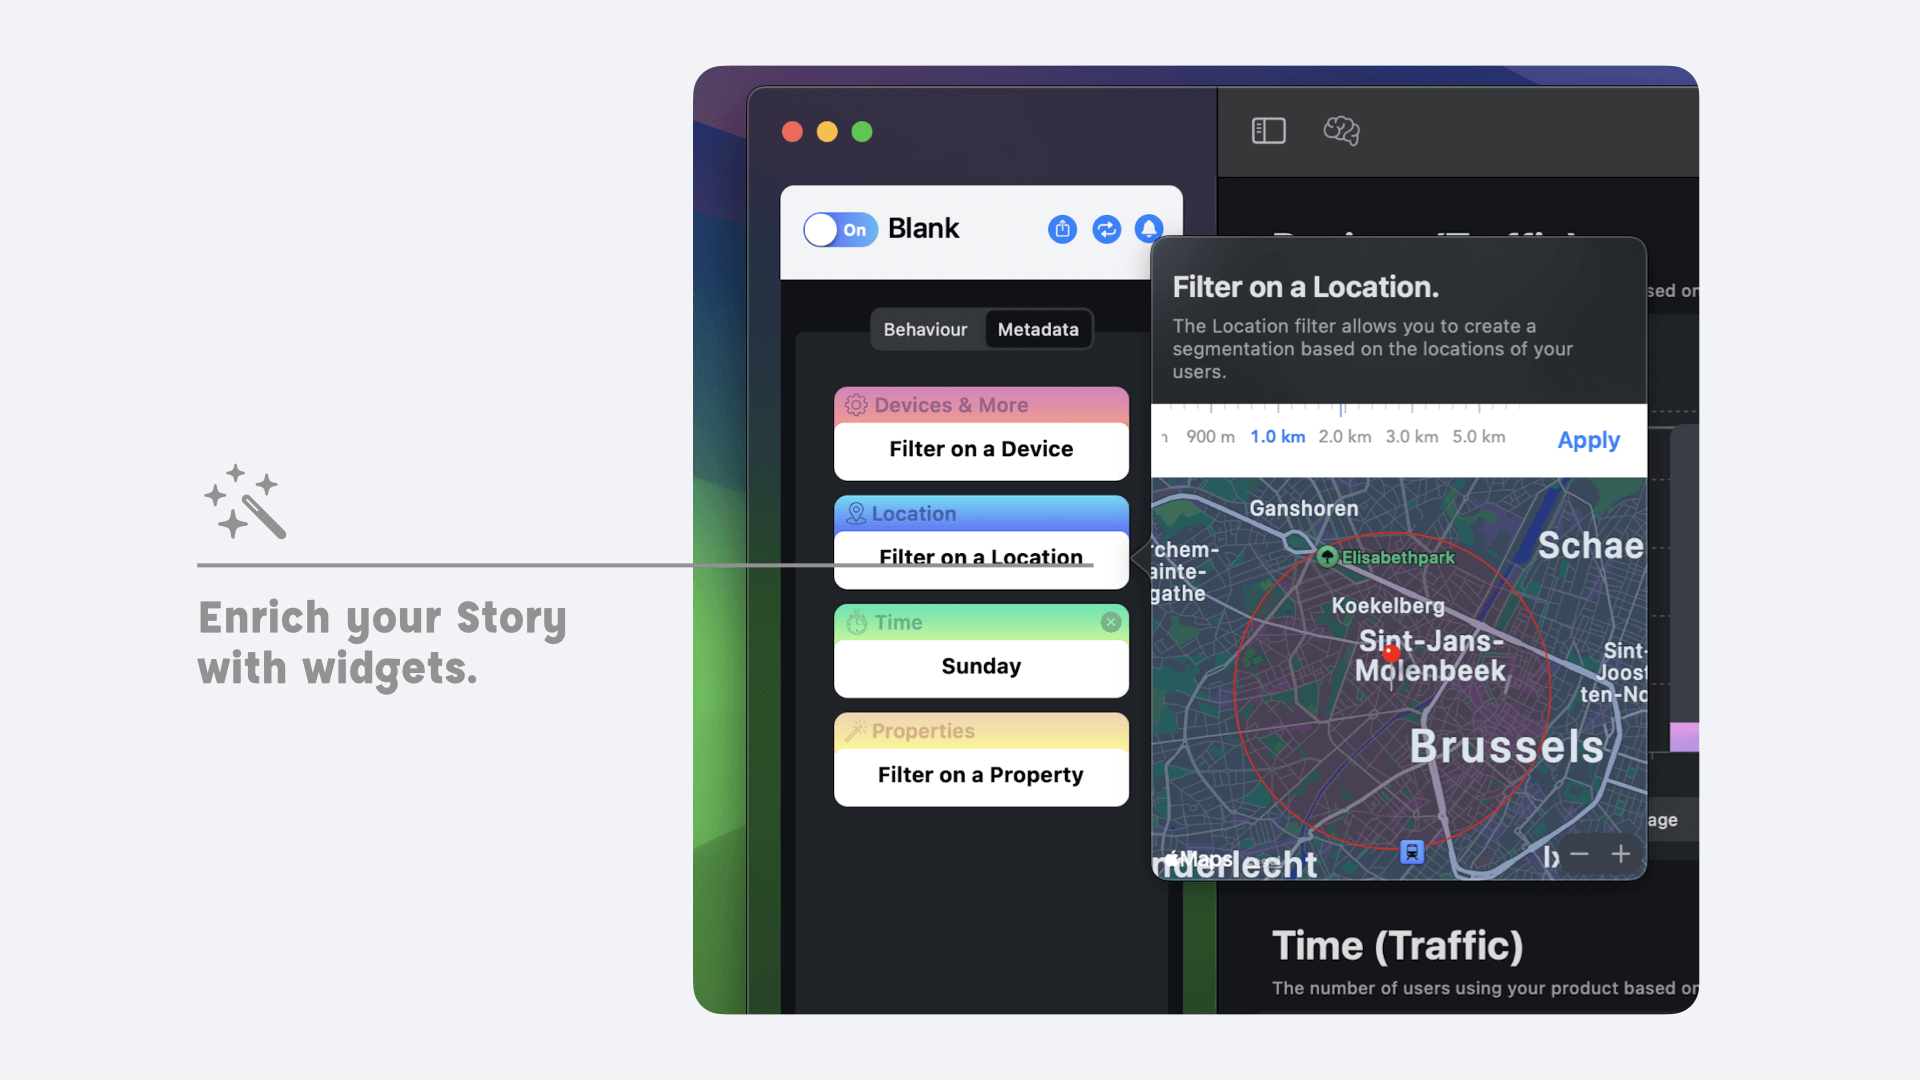
Write more advanced Stories
Adding widgets allows you to enrich your stories. To add constraints to your story based on your widgets, open one of your stories and then go to the second tab entitled "Metadata", where you'll see filters based on your widget selection. Each widget lets you define a specific constraint (e.g. the location widget lets you filter on a specific location, while the user cohort lets you filter on a specific user cohort...).